
The Video Project
Watch this professionally made high-quality video to introduce the subject:
Cool, huh?
O.K., here's how it is going to happen:
STAGE 1
Find a few partners. We will need to be in seven groups. One group will have three members and the rest will have four. Decide on a leader for your group.
Stage 2
Pick what scene your group wants to re-do. You can choose any scene that you feel has importance to the plot. I think you may be best served by choosing from:
- The Capulet party
- The balcony scene
- Romeo convinces Friar Lawrence to help
- Tybalt vs. Mercutio
- Romeo vs. Tybalt
- Lord Capulet not very happy with Juliet
- Juliet and the Friar make a plan
- Romeo vs. Paris
- Romeo and Juliet in the tomb
The video will be around 6 minutes, so you can only have so much.
Stage 3
Decide what twist you are going to put on it. Here are some suggestions, but you may pick your own.
- Update the setting. Years ago, a small group of students became fairly famous for shooting the last act of Macbeth in a Star Wars setting. Pick your own fandom to put them in.
- Make it a high school production with the drama teacher about to go crazy with how they don't "get" it and has to constantly interrupt and explain to them how to act it out. (Something similar to the Randy Savage Slim Jim commercial.)
- Make it a news cast. Using the green screen you should be able to easily add pictures and footage to the scene. Maybe after the TRAGIC DOUBLE TEEN SUICIDE or something like that.
- ?????? Be creative! Come up with your own spin!
The point is that you are going to show me that you KNOW this scene and what makes this scene important.
Stage 4
Start planning it out. Here is the "storyboard" that I used to figure out my little video (I know, you thought it was made by a professional). You will need some sort of a plan to make it actually work. What props will be needed? What costuming will be needed? What sort of special effects are you going to use?
Stage 5
Start filming. Here is how this works. We will be in the library
media center learning commons and will make use of the iPads there.
There is a program on it called Green Screen. With this icon:

It allows you to layer video and images over each other. Here is a screen shot:
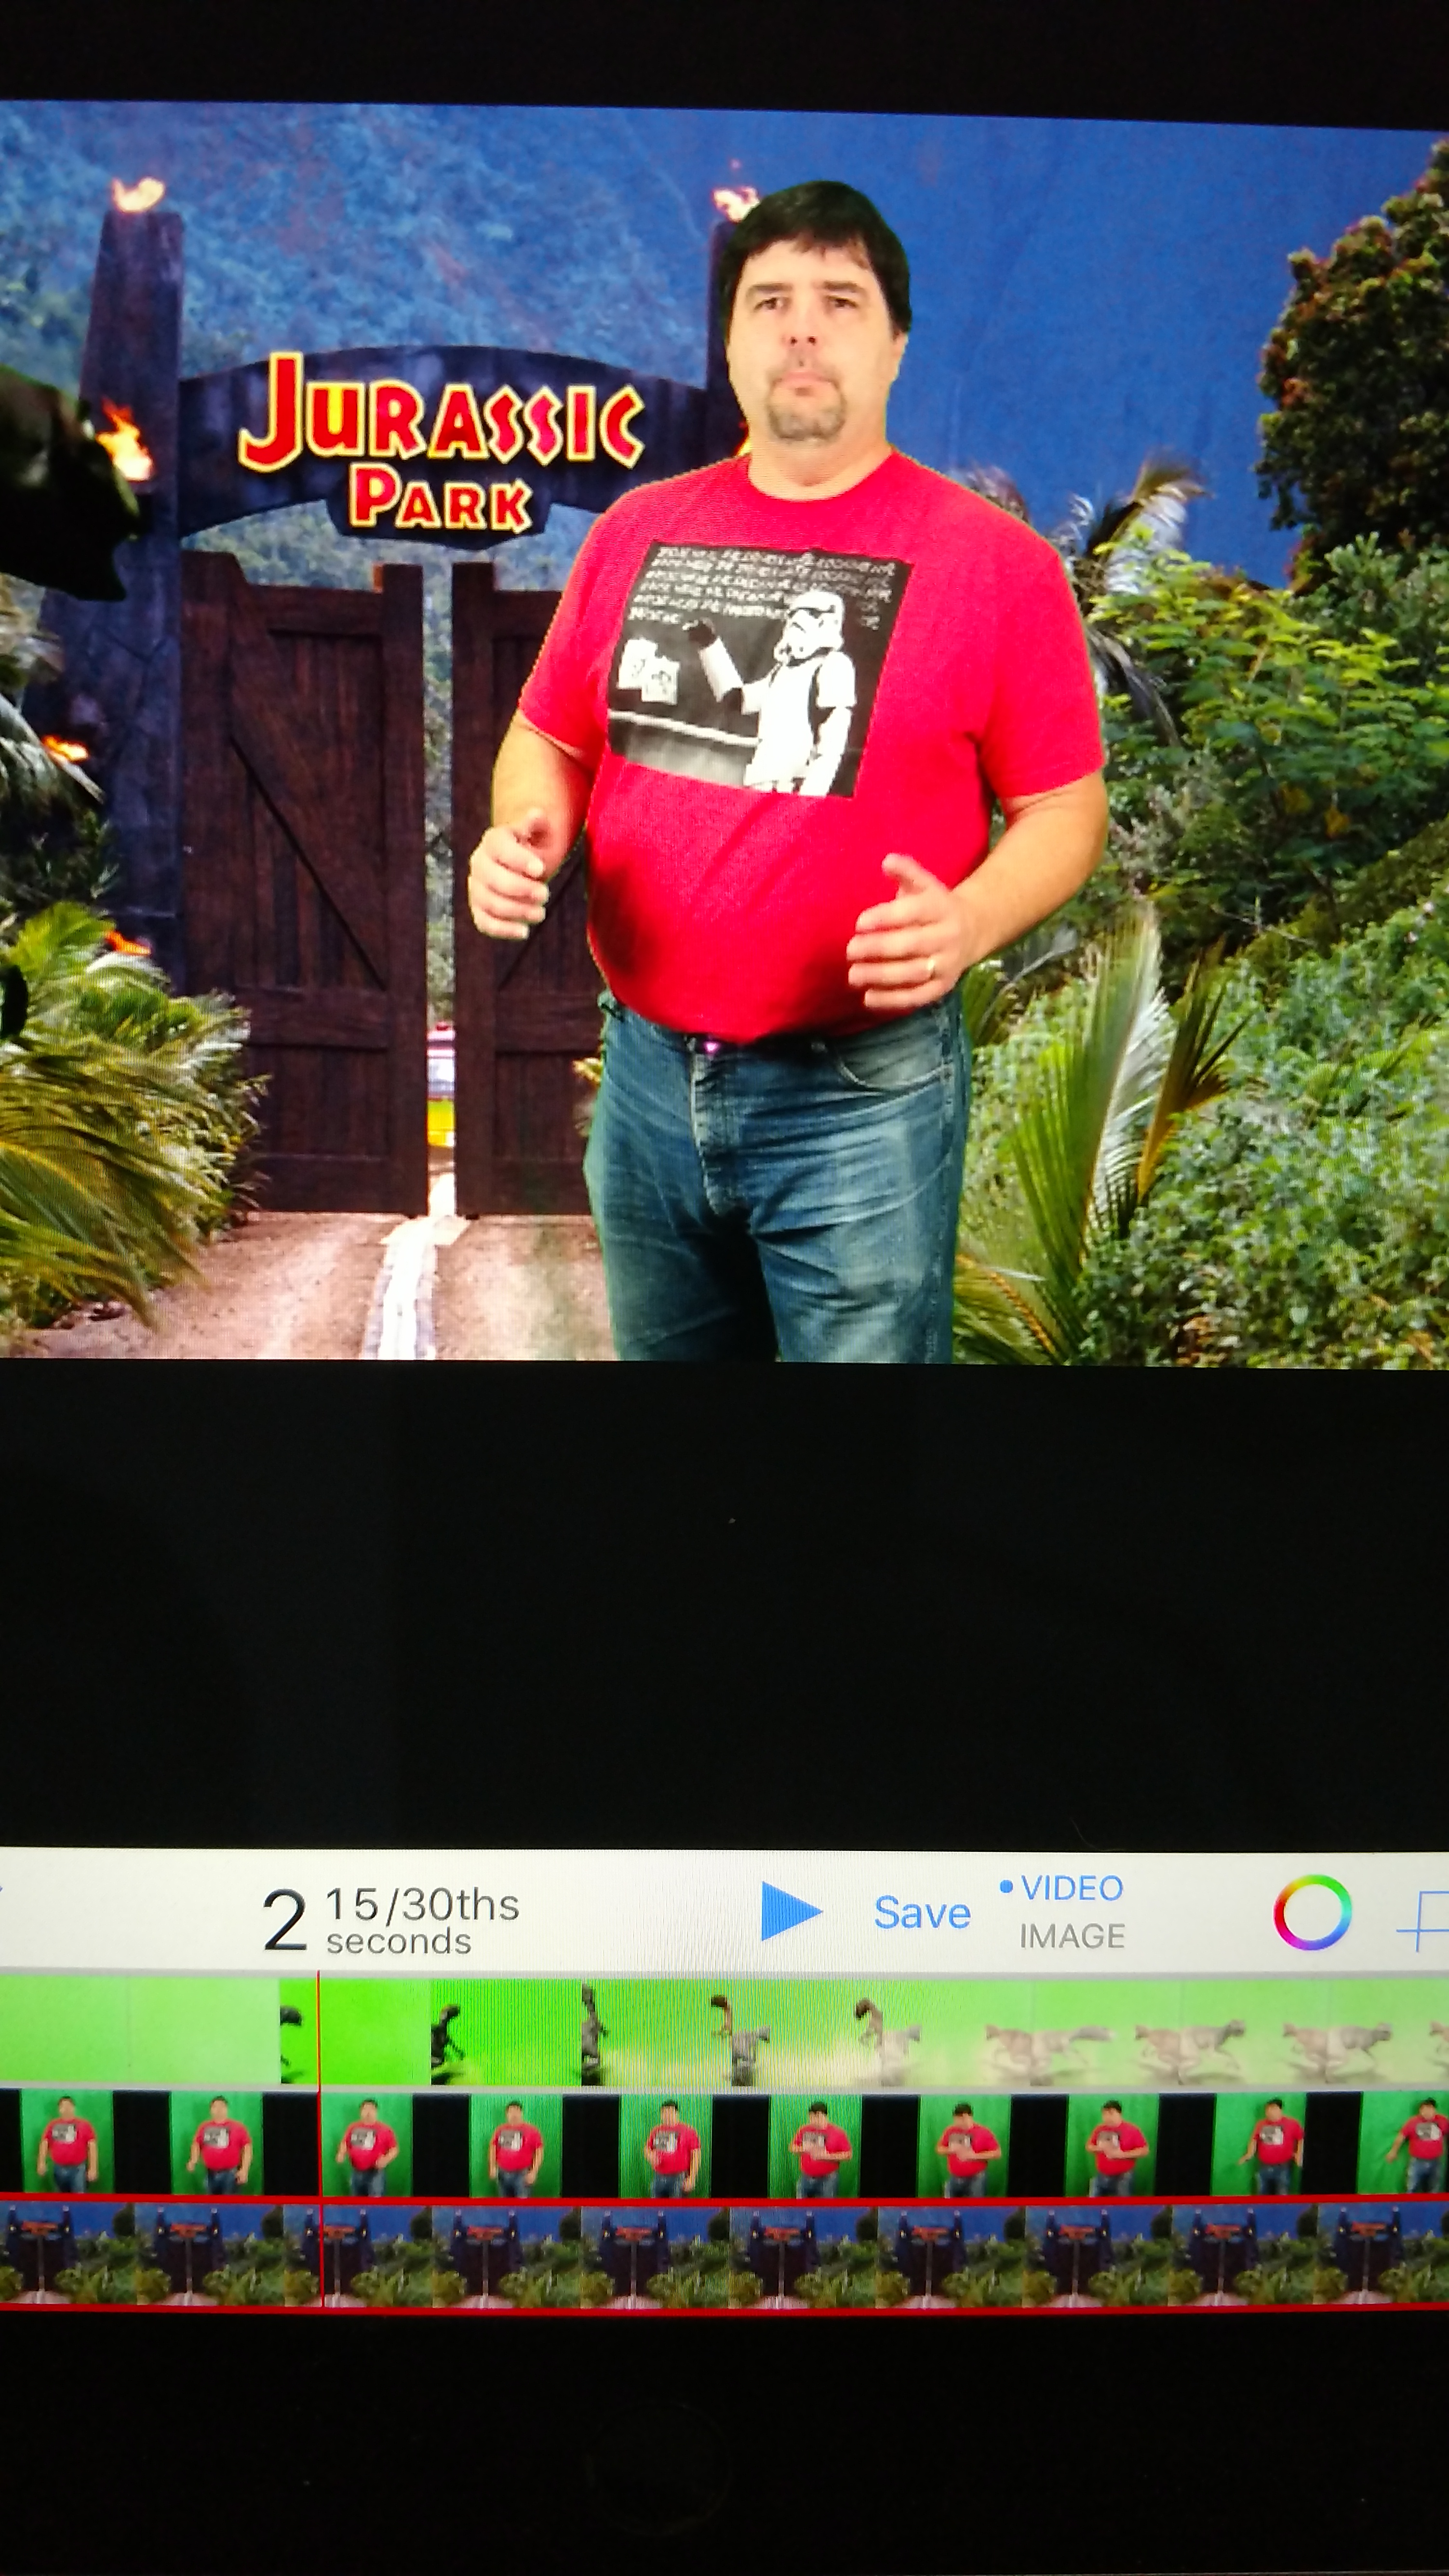
You can see this is a scene from the Jurassic Park version. At the bottom of the image you can see three layers of video. The bottom layer is my background. It must be on the bottom because everything else needs to lie on top of it. The middle layer is of me standing in front of a green screen. When I lay that on top of the background, everything that is green becomes see through (which is why you should not where green shirts). The top layer are the dinosaurs which are also over a green screen. They must be on top, otherwise I would always be in front of them.
But, you may ask, how did you do the part where you were on the screen THREE times plus there was a BACKGROUND. Didn't that take FOUR layers?
It sure did, you bright and competent student. So I just filmed the extra me images and then saved them as a video. Then I opened a new project and used that as one of my three layers. So I had the background (layer 1), me talking (layer 2), and the extra versions of me (layer 3). By doing that, I can include as many layers as I want.
Here are some more super pro tips:
- Use Google Image or You Tube for background images.
- Search You Tube for green screen special effects (I can unlock any that you need). Try searching "Green Screen" "Chroma Key" and "Overlay" to find images and video that can be used.
- Shoot it in short clips - this makes editing easier and it also changes up the camera angle for a more dynamic shoot.
- There is no way to put in a soundtrack unless you have it as a video. You can make an audio file and turn it into a video at this site: http://www.online-convert.com/.
- Did you end up catching some of the lights or non-greenscreen wall in your video? No problem. Click the theater mask icon and it will allow you to erase things out of the video.
- The editing feature on Green Screen is limiting, so you may want to edit it on your own computer or a computer at home. There is a Google Chrome app that seems to be a good one. Go here to get it on your Chromebook: https://chrome.google.com/webstore/detail/wevideo-video-editor-and/okgjbfikepgflmlelgfgecmgjnmnmnnb/related?hl=en .
- You can film anywhere on any device. Just stick the video file into your Google Drive once you have edited it.
Stage 6
Now we save the finsihed video and send it to Lord Alford to upload to YouTube!